Tutorial 3 - Navigation
Tutorial 3 - Navigation
During this tutorial I learnt how to create NavMesh Agents, NavMesh Links, NavMesh Obstacles and Simple Raycasting. To start the tutorial, I used my pre-existing scene which I have been working on in previous tutorials. To create the NavMesh so that my character could navigate around the environment. I installed and updated the AI Navigation package via the Unity Package Manager.
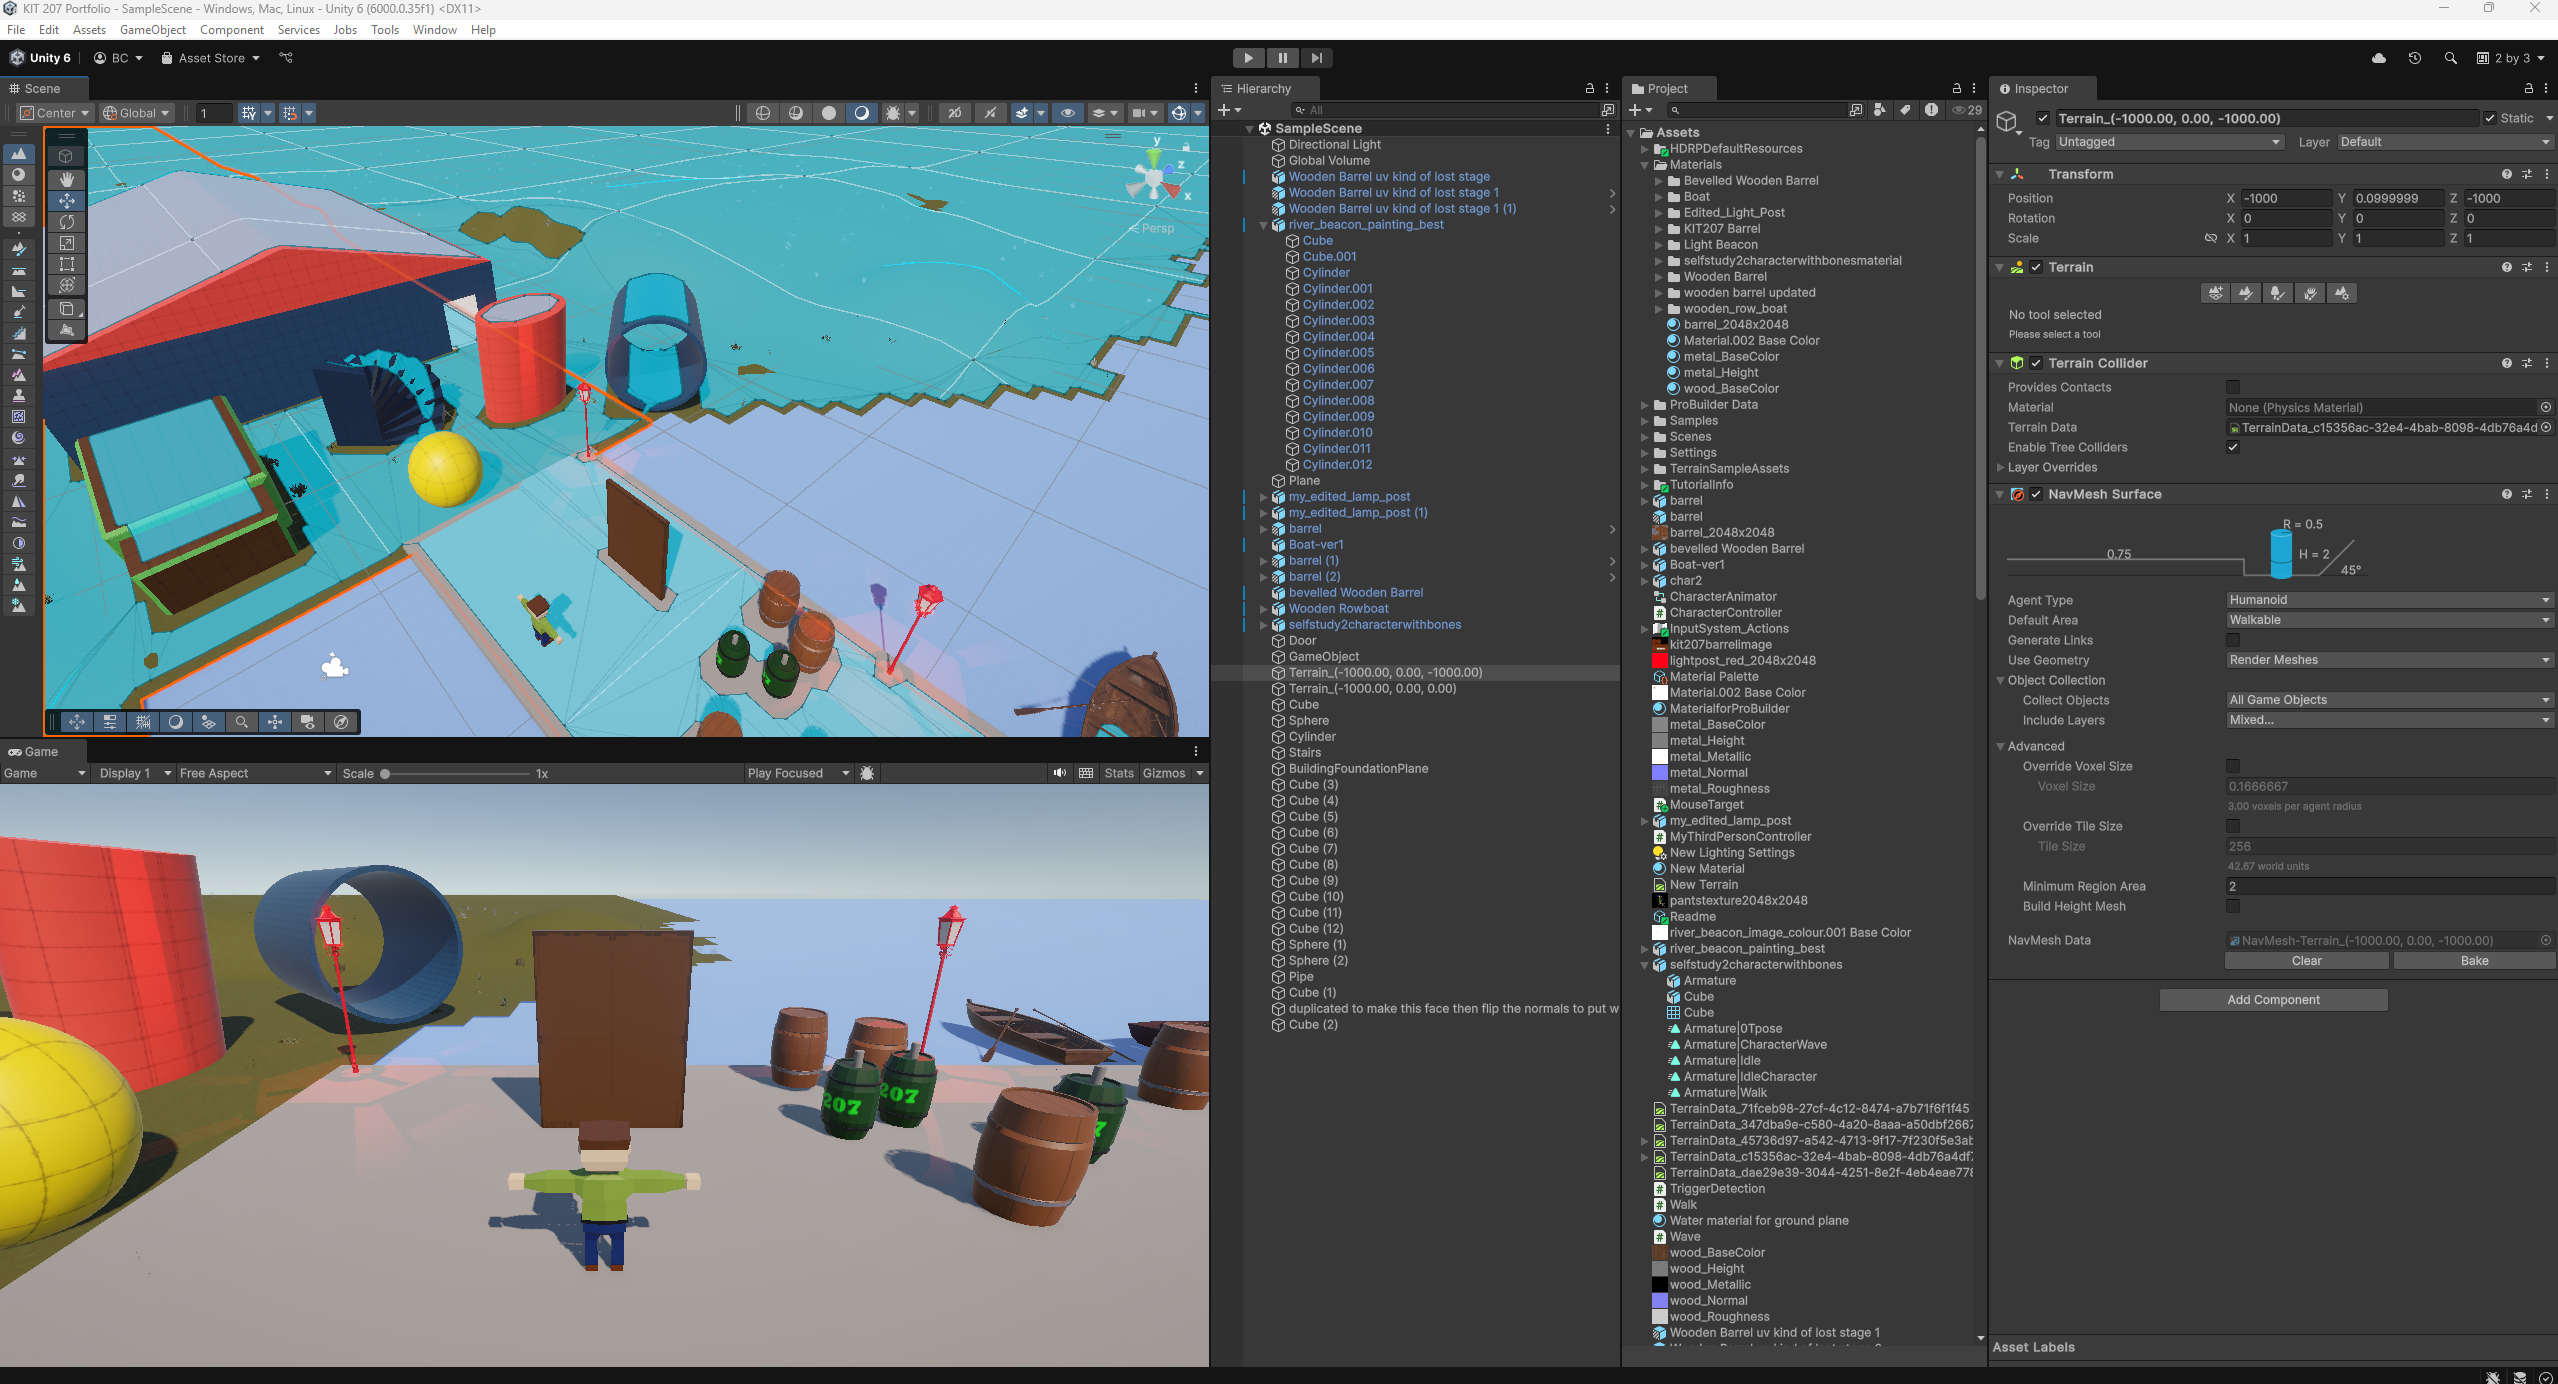
I then clicked on a terrain object and added a NavMesh Surface component as seen below: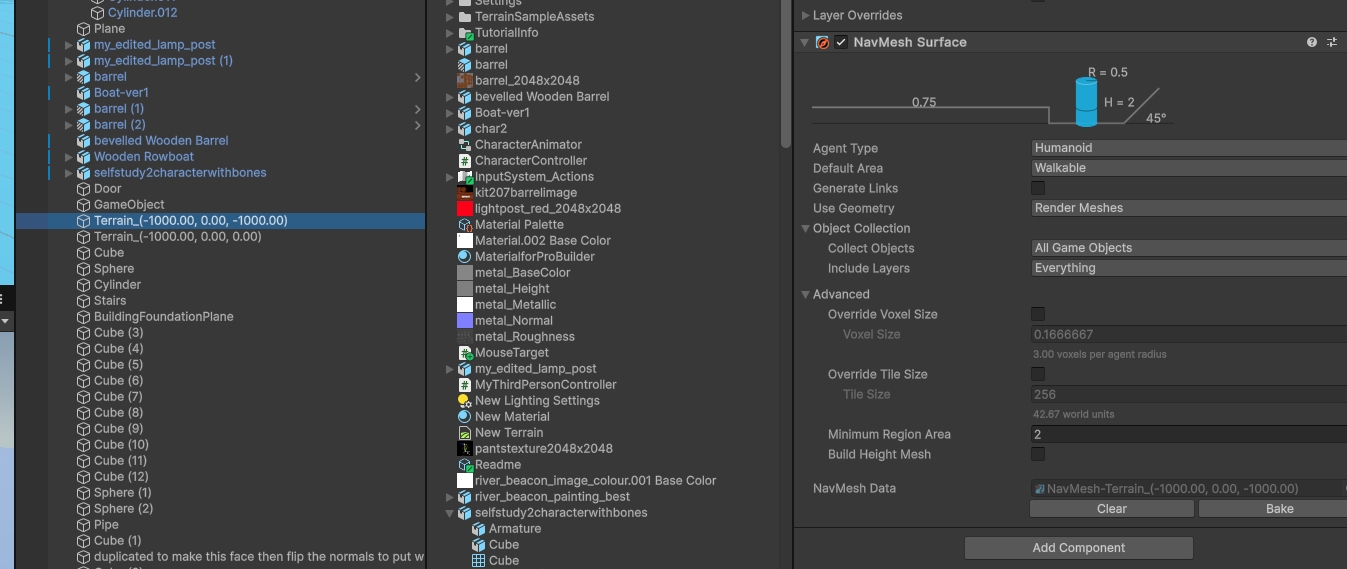
NavMesh Surface component applied to Terrain.
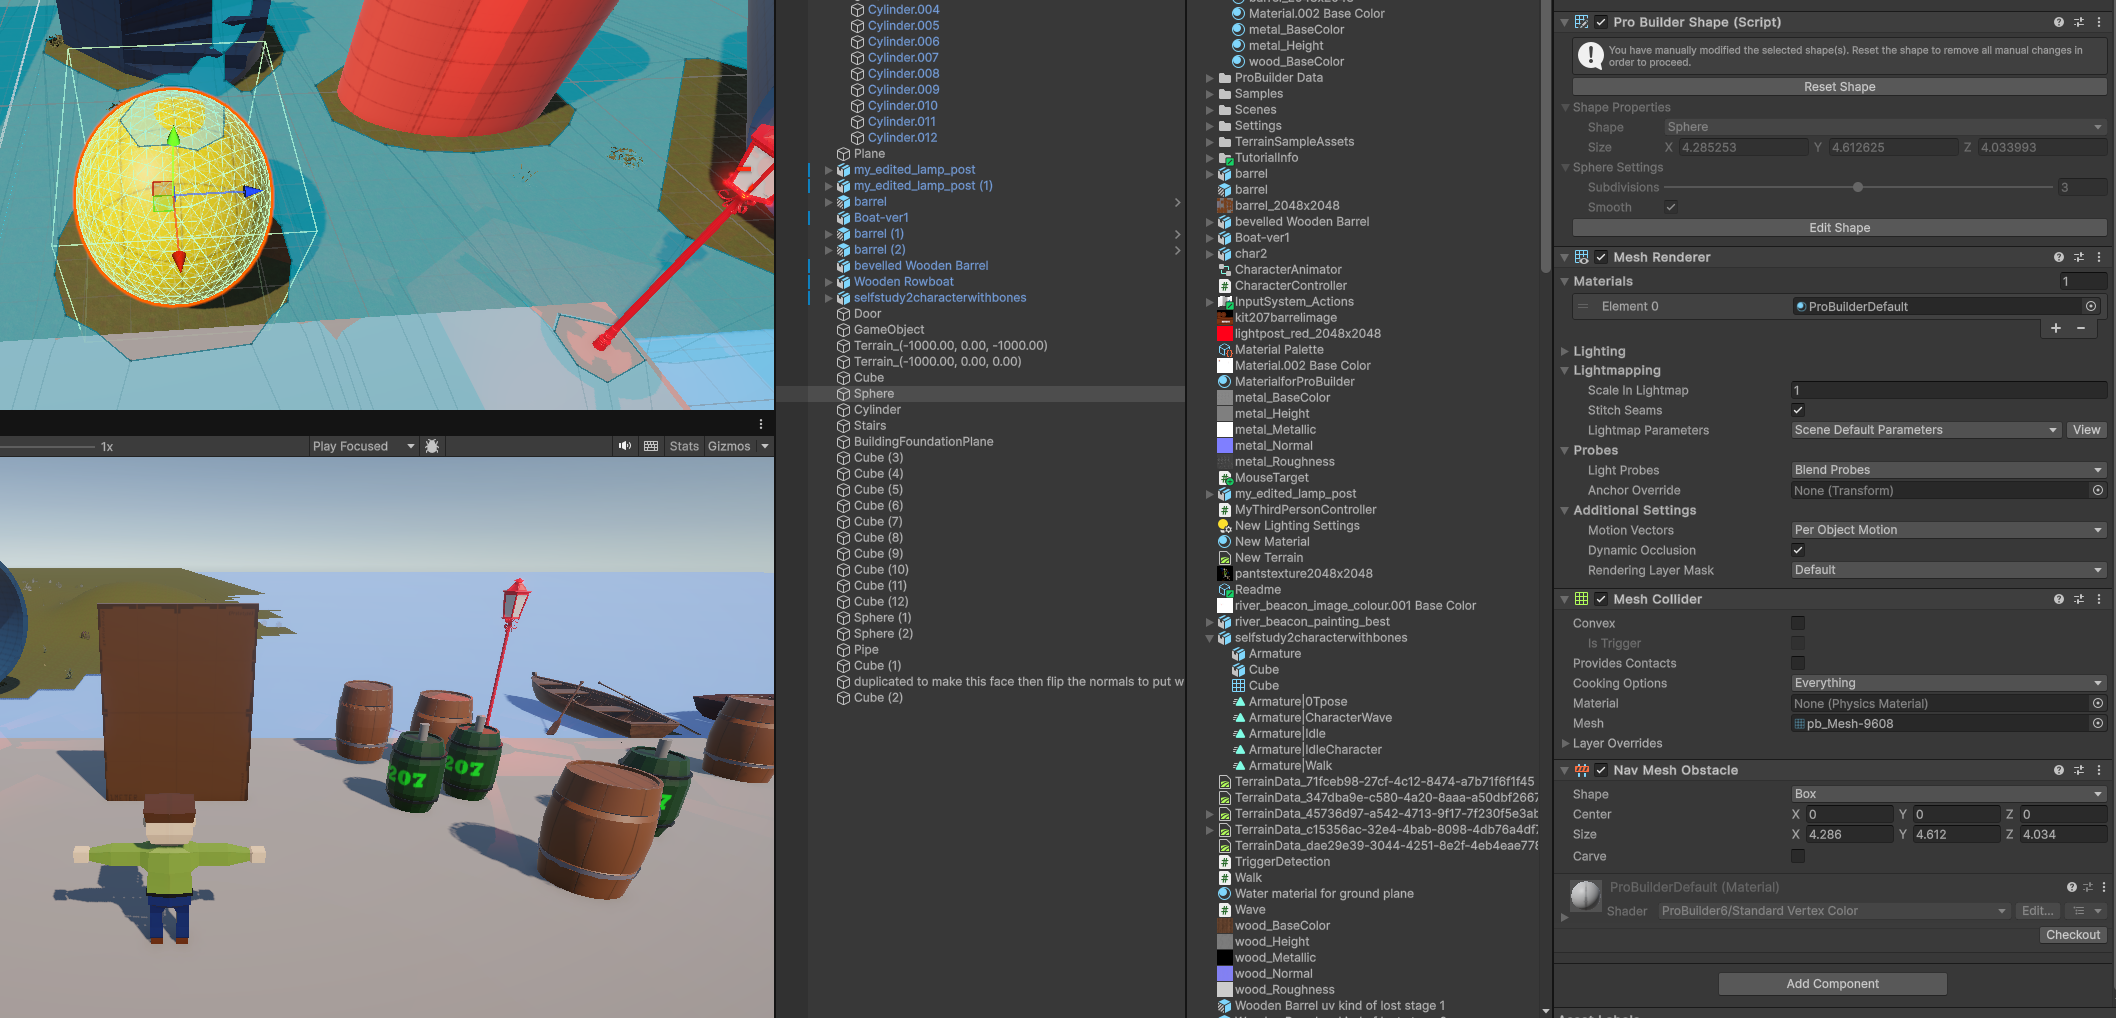
Nav Mesh Obstacle applied to Yellow Sphere before selecting bake on the NavMeshSurface component which was on the Terrain.
I then selected Bake on the NavMeshSurface component which was on the Terrain, and this was the effect as seen below:
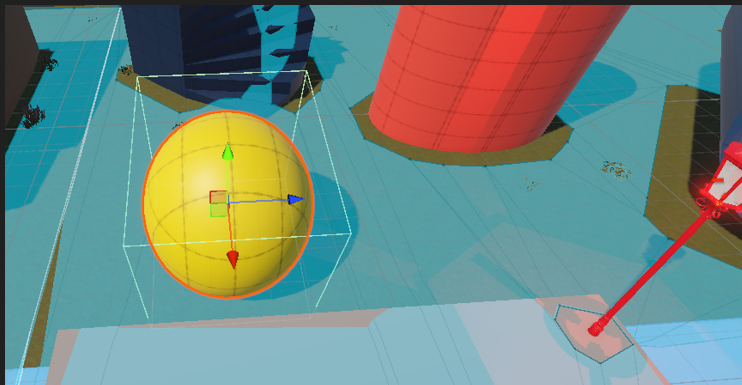
NavMeshObstacle component applied and then Baked again in the Nav Mesh Surface component on the Terrain.
After that, I decided to add a Layer to the Water Plane so that I could set it up so that the Player could no longer walk on the Water when using the Nav system. I added a layer to the Water plane.
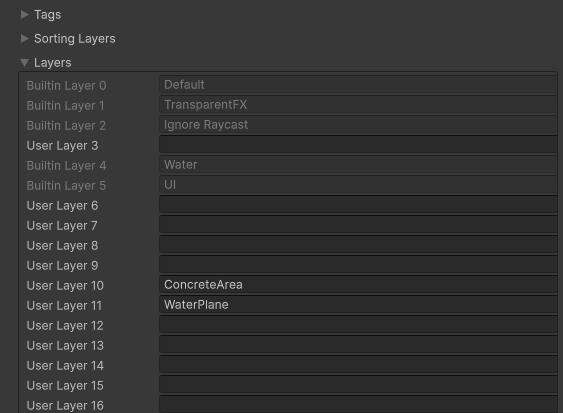
Layers in the Inspector.
In the scene below you can see that the layer was excluded from the Nav Mesh Surface by unchecking the WaterPlane layer in the Include Layers section on the NavMesh Surface component for the Terrain:
WaterPlane layer excluded from NavMeshSurface component for the Terrain.
Following that I added a drop height and a jump distance to the Navigation window, then checked the Generate Links checkbox and re-clicked Bake, which then showed more detail about drop heights and jump distances as seen in the screenshots below: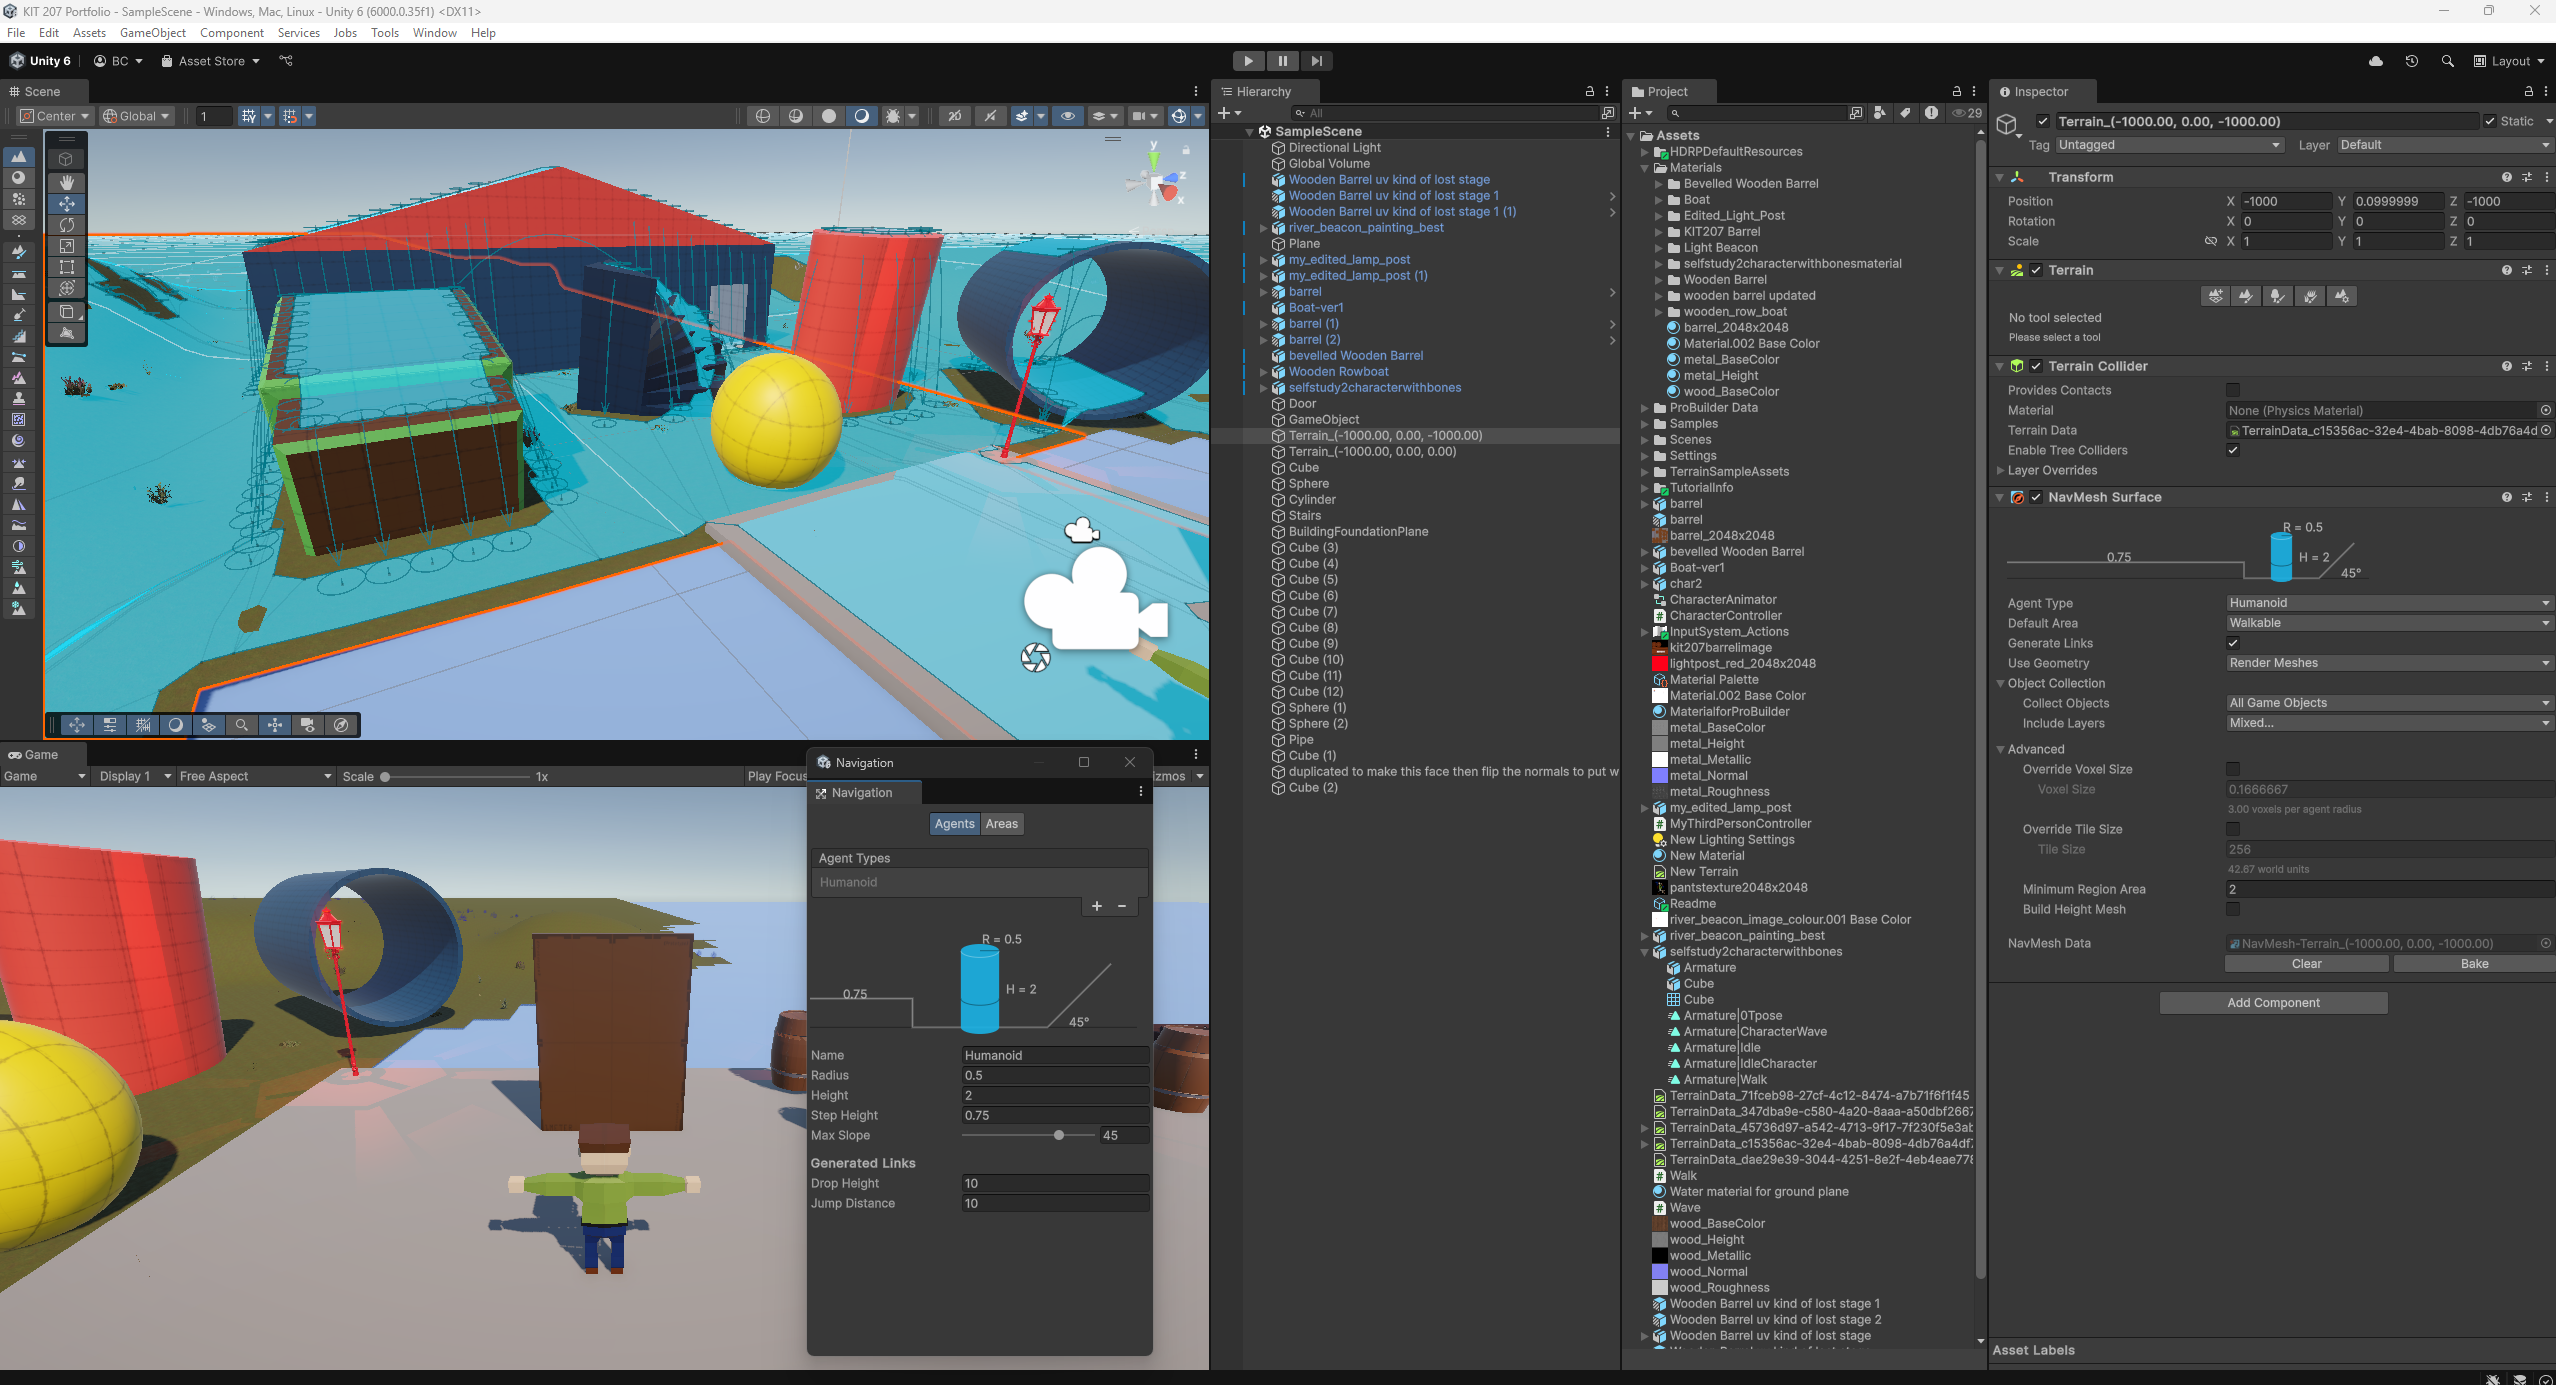
Drop height and jump distance added.
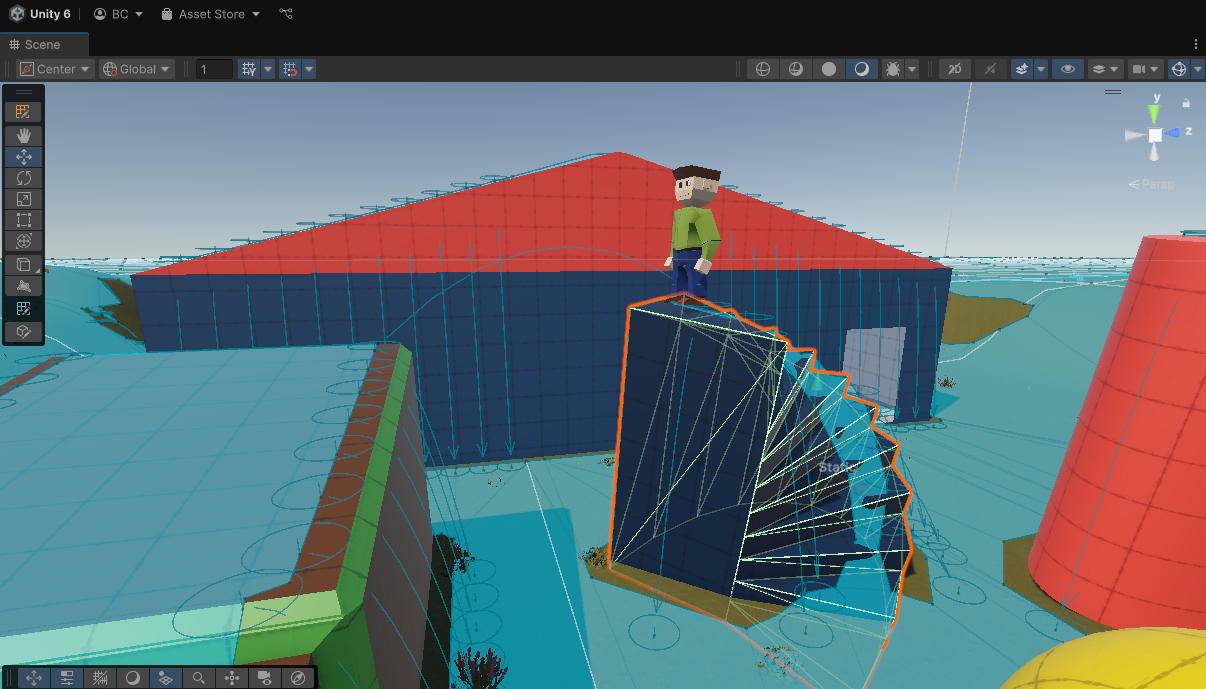 Screenshot displaying more detail of drop heights and jump distances.
The next part of the tutorial involved Raycasting in order to query underlying physics system in Unity, so that they can be used to find out what colliders are within that mouse click area as an example, or with a specific line or point in the scene. Then that information can be used for different purposes.
I used the script lines provided in the tutorial instructions to make the MouseTarget script. After attaching it to my player character, and with a NavMeshAgent component on the Player, it was able to navigate to where I clicked on the screen with the mouse and move toward the location, as well as navigate around obstacles.
In the script it has a debug for the Console whenever you click on a position.

Console Debug information for MouseTarget script.
I setup a barrier and applied a Nav Mesh Obstacle component to it as seen below:
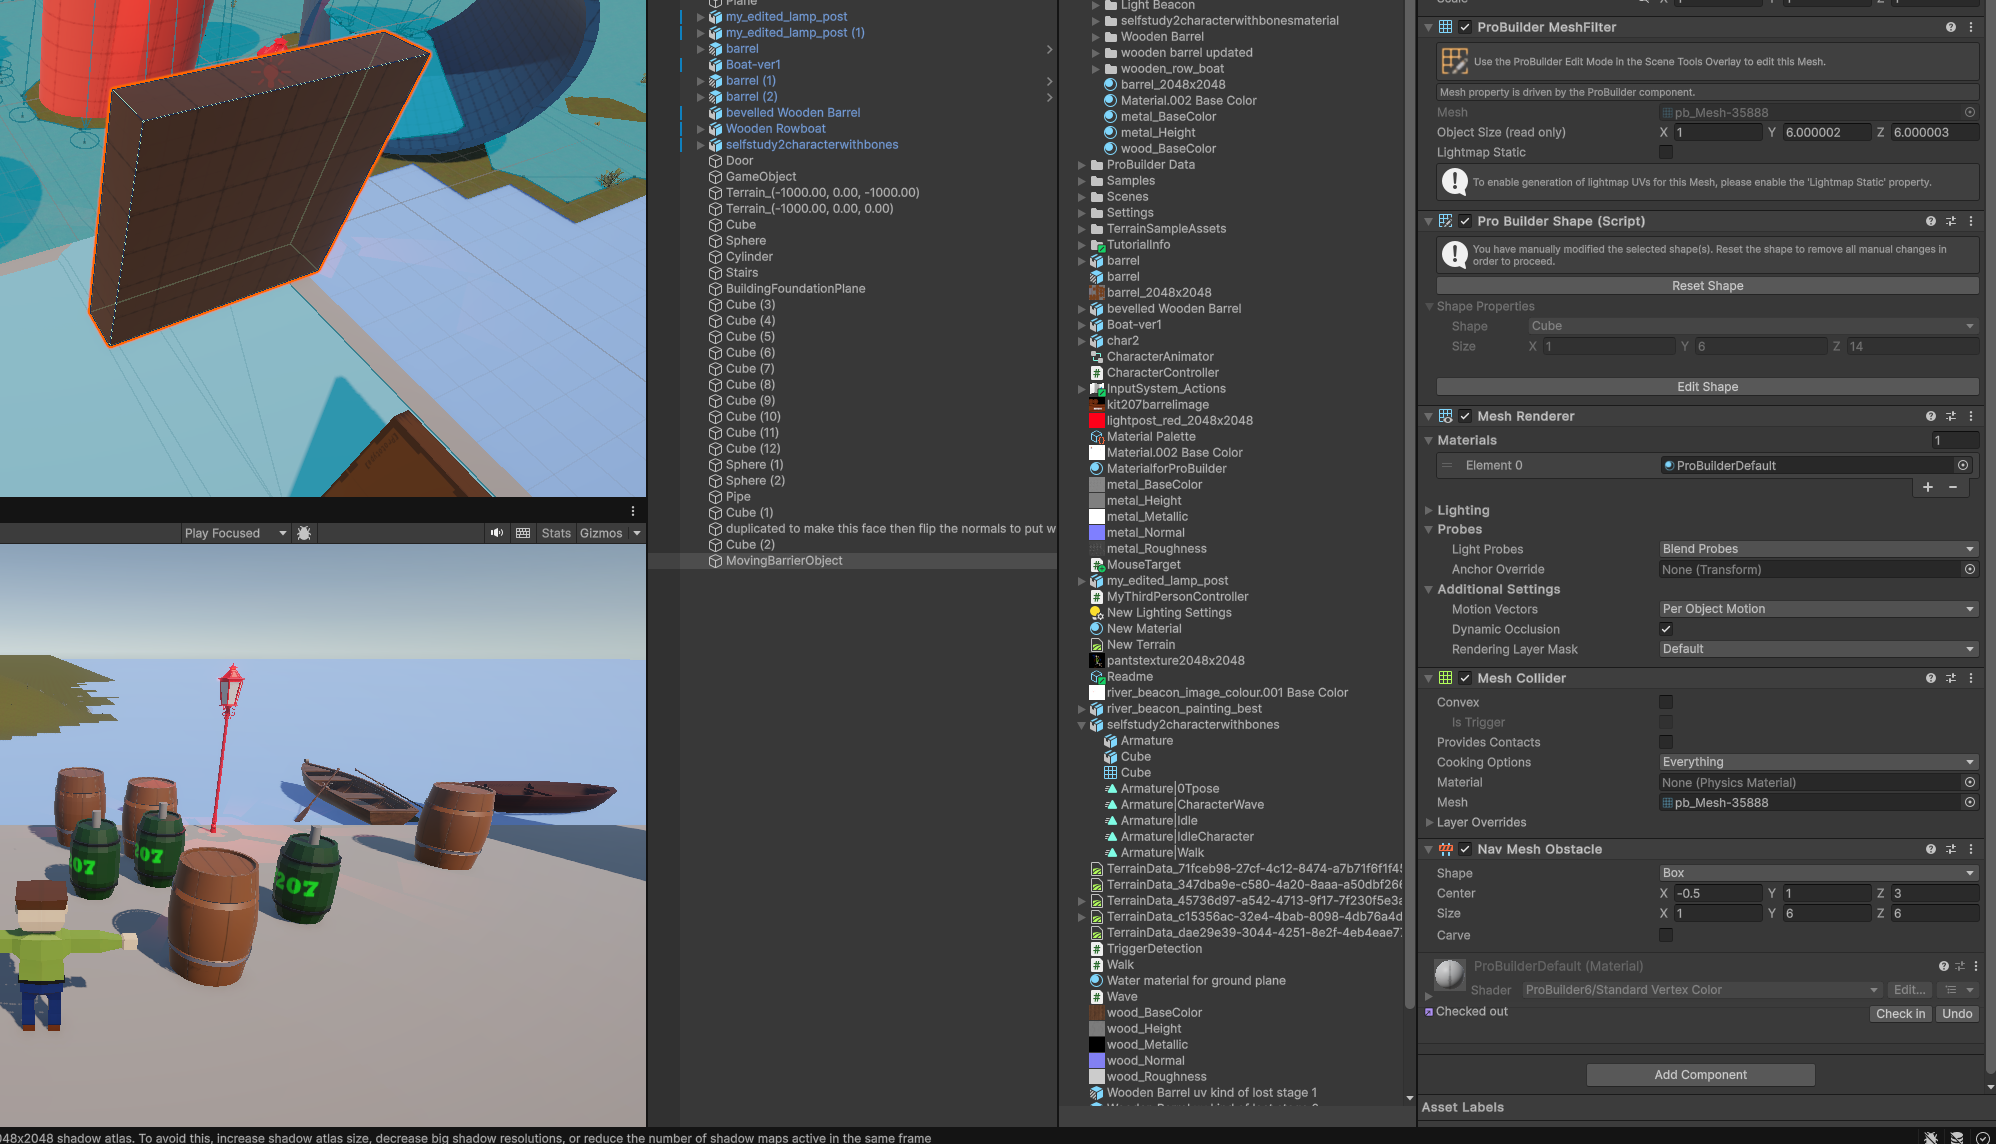
Nav Mesh Obstacle applied to barrier.
Next, I wanted the barrier to move so I could test the Navigation of my player when walking around a moving object, so I needed to create a script. As generative AI is permitted, I used Microsoft Copilot to assist with my learning of scripting for unity and C#, so using plain text prompts I generated the script called MovingObstacle.cs (Copilot, 2025).
In regard to the Nav Mesh Obstacle component attached to the barrier. There is a tick or untick Carve Only Stationary. The below .gif file is a short time frame and cuts off before restarting, but you can see the Carve Only Stationary option has been turned off and it moves with the object as it moves, rather than just when it is stationary. This is seemingly better but more expensive performance wise I had read in the tutorial. Having the Carve Only Stationary unticked seems to be better for when the character is trying to navigate through the barrier.
Carve Only Stationary option has been turned off
The next part of the tutorial involved removing the raycasting code from the Agent / Player, and using those concepts to Instantiate an enemy AI prefab where the Player clicked the mouse button.
I copied my character player object and renamed it to EnemyAI and made it into a prefab.
I made scripts by using plain text prompts in Microsoft Copilot, it generated scripts such as the InstantiateEnemyAIprefab.cs (Copilot,2025), EnemyFollowPlayer.cs (Copilot,2025), EnemyAnimator.cs (Copilot,2025) and later EnemyFollowWithPrediction.cs (Copilot,2025). The InstantiateEnemyAIprefab script was applied to an empty game objected called EnemySpawner. In order to get the Enemy to walk properly whenever, I copied the Players Animator Controller and Renamed it to EnemyAI_Animator and assigned it to the EnemyAI prefab.
I then created a Speed float parameter in the Animator which would allow the EnemyAI to transition between Idle and Walk based on its speed. I set the Idle to Walk condition as Speed Greater than 0.1, and for the transition back from Walk to Idle if the Speed reached Less than 0.1. All of this helped to ensure the EnemyAI would walk when it should rather than just floating and moving toward a location, it would use the Walk animation and when stationary it would use the idle animation just like the character. Screenshots are below showing the details:
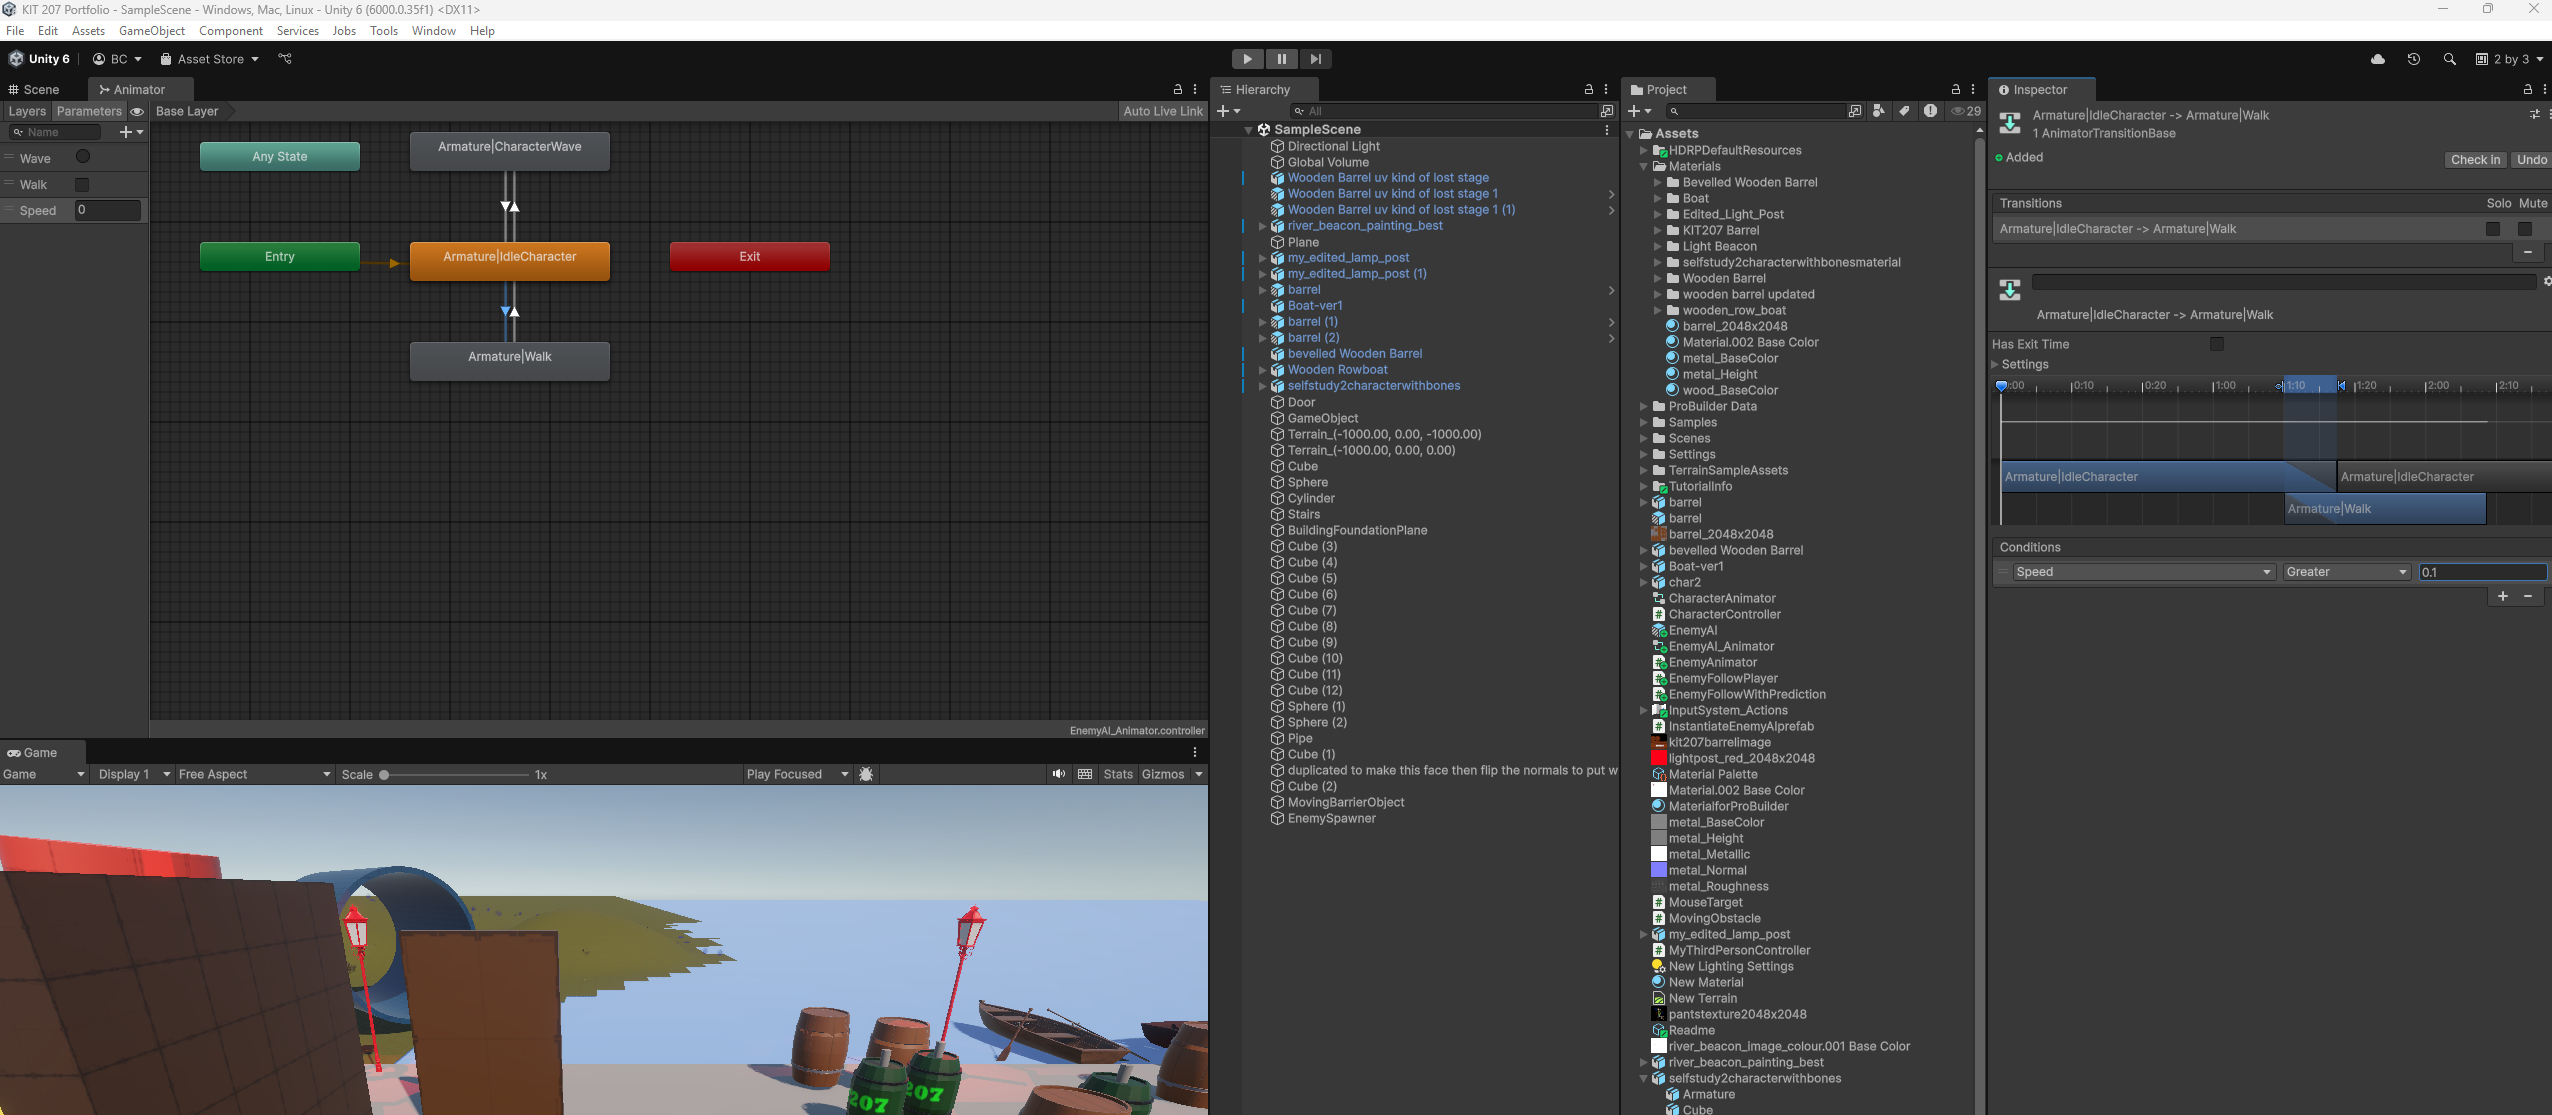 Idle to Walk transition condition set as Speed Greater than 0.1.
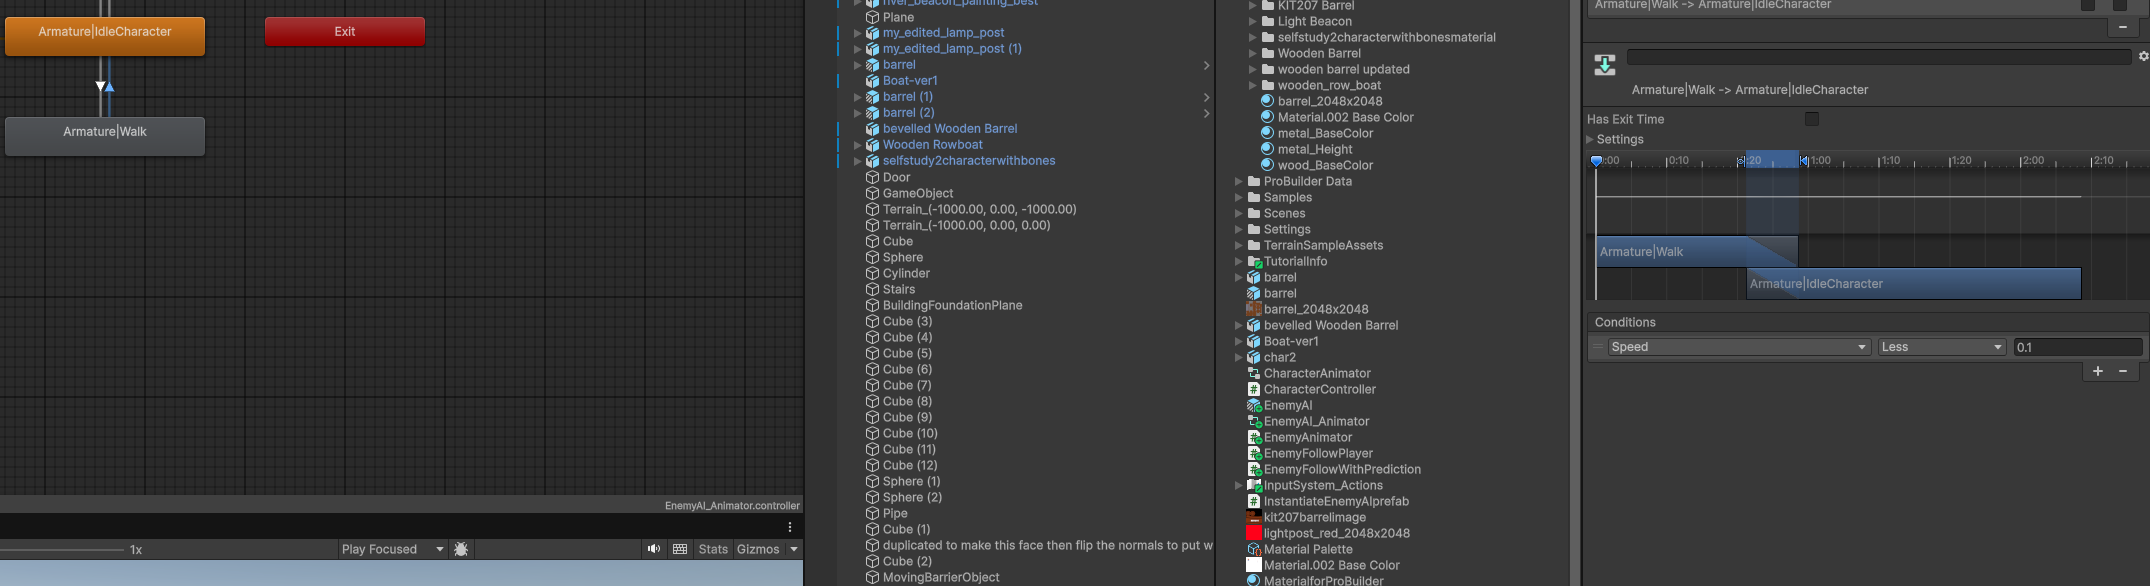
Walk to Idle transition condition set as Speed Less than 0.1.
So now with the animation's setup, and the instantiation script on the EnemySpawner game object, as well as the EnemyFollowWithPrediction script applied to the EnemyAI prefab. I could walk around with my character and then click anywhere on the screen and spawn multiple EnemyAI prefabs into the game, which would then follow and predict my movements according to the settings changeable in the inspector.
Instantiation of AI characters using raycasting.
AI characters chasing my 3rd-person character around the environment.
AI characters chasing my character and getting around the obstacle.
Overall, I found the tutorial very useful for setting up navigation in a scene, I will likely refer back to the tutorial and this page when creating other projects.
References:
Copilot (2025), MovingObstacle.cs. Script created on 18 March 2025. Script generated using plain text prompts in Microsoft Copilot. Available at: https://www.microsoft.com/en-us/microsoft-365/copilot (Accessed: 18 March 2025).
Copilot (2025), InstantiateEnemyAIprefab.cs. Script created on 18 March 2025. Script generated using plain text prompts in Microsoft Copilot. Available at: https://www.microsoft.com/en-us/microsoft-365/copilot (Accessed: 18 March 2025).
Copilot (2025), EnemyFollowPlayer.cs. Script created on 18 March 2025. Script generated using plain text prompts in Microsoft Copilot. Available at: https://www.microsoft.com/en-us/microsoft-365/copilot (Accessed: 18 March 2025).
Copilot (2025), EnemyAnimator.cs. Script created on 18 March 2025. Script generated using plain text prompts in Microsoft Copilot. Available at: https://www.microsoft.com/en-us/microsoft-365/copilot (Accessed: 18 March 2025).
Copilot (2025), EnemyFollowWithPrediction.cs. Script created on 18 March 2025. Script generated using plain text prompts in Microsoft Copilot. Available at: https://www.microsoft.com/en-us/microsoft-365/copilot (Accessed: 18 March 2025).
Leave a comment
Log in with itch.io to leave a comment.